Night photography offers a unique opportunity to capture scenes in a completely different way. The darkness of the night combined with artificial light sources can create magical and dramatic images, from starry skies and cityscapes to light trails and long exposures. Whether you’re shooting in the city or out in nature, understanding the techniques for capturing perfect night photos can help you create stunning images that showcase the beauty of the night.
In this article, we’ll explore essential tips and techniques for mastering night photography, from camera settings and equipment to composition and post-processing.
The Challenges of Night Photography
Night photography presents unique challenges, mainly due to low light conditions. With less natural light available, it’s crucial to adjust your camera settings appropriately to ensure sharp, well-exposed images. These challenges also present opportunities to get creative with lighting and composition.
1. Low Light and Long Exposures
Since it’s often dark, achieving proper exposure can be tricky. You’ll need to allow more light into your camera by using longer exposure times, wide apertures, and higher ISOs. The key is balancing these settings to avoid underexposure (too dark) or overexposure (too bright).
2. Camera Shake
Long exposure times increase the risk of camera shake, which can result in blurry images. To avoid this, you’ll need a stable tripod and the use of remote shutter release or self-timer to prevent movement when pressing the shutter button.
3. Noise
Higher ISO settings, which are often necessary for night photography, can introduce noise (grain) into your images. It’s important to manage the ISO and post-processing noise reduction techniques to minimize this issue.
Essential Equipment for Night Photography
While night photography can be done with any camera, certain equipment can help you achieve better results and make the process easier.
1. Camera with Manual Controls
A camera with full manual controls is essential for night photography. You’ll need to adjust settings like ISO, shutter speed, and aperture to capture the best image possible in low-light conditions. Most DSLRs and mirrorless cameras offer manual mode, which gives you complete control over your exposure.
2. Tripod
A sturdy tripod is essential for night photography, as it will keep your camera steady during long exposures. The longer the exposure, the more likely it is that camera shake will ruin your shot. Make sure your tripod is sturdy enough to support your camera and lens.
- Tip: Use a tripod with adjustable legs to help level your camera on uneven ground and prevent any movement.
3. Remote Shutter Release or Self-Timer
Using a remote shutter release or the self-timer function on your camera will prevent you from accidentally shaking the camera when pressing the shutter button. This is especially important for long exposures where every movement is magnified.
4. Fast Lens (Wide Aperture)
A lens with a wide aperture (low f-stop) such as f/2.8 or f/1.8 is ideal for night photography. A wider aperture allows more light to enter the camera, enabling you to use faster shutter speeds without increasing your ISO too much.
Wide-aperture lenses are also great for capturing starry skies or astrophotography, where you’ll want to let as much light in as possible.
Camera Settings for Night Photography
When shooting at night, you’ll need to adjust your camera settings to accommodate the low light conditions. Here’s how to set up your camera for the best results:
1. Shutter Speed
The longer the exposure, the more light will enter the camera, allowing you to capture more detail in low-light scenes. However, a shutter speed that’s too long can cause motion blur, especially if there’s movement in your scene.
- For starry skies, a general rule is to keep your shutter speed below 20 seconds to avoid star trails. A good starting point is around 15 seconds.
- For light trails, you’ll need longer shutter speeds, anywhere from a few seconds to several minutes, depending on how much light movement you want to capture.
To determine the ideal shutter speed, you can use the 500 Rule, which states that the maximum exposure time for astrophotography is 500 divided by the focal length of your lens. For example, if you’re using a 24mm lens, the maximum exposure time would be around 21 seconds (500 / 24).
2. Aperture
For most night photography, you’ll want to use a wide aperture (low f-stop) to allow as much light in as possible. An aperture of f/2.8 to f/4 is typically ideal for shooting in low light, but if you’re shooting with a wide-angle lens and want a greater depth of field, you may need to increase your aperture (e.g., f/5.6).
Be careful not to use an aperture that’s too small, as it can result in diffraction and reduce the sharpness of your image.
3. ISO
Higher ISO settings are often necessary for night photography, but they can also introduce noise. The key is finding the right balance between ISO and shutter speed to avoid underexposure or excessive noise.
- Low ISO (100-400): Ideal for capturing cityscapes or star trails with longer exposures.
- Medium ISO (800-1600): Suitable for most night photography situations, where you need to keep your exposure time reasonable while reducing noise.
- High ISO (3200 or above): You may need to increase the ISO for really low-light conditions, but be prepared for noise. If you’re shooting in extremely dark environments, a higher ISO will help you capture more light, but you may need to reduce noise in post-processing.
4. Focus
Focusing at night can be tricky, as autofocus often struggles in low light. To ensure your images are sharp, focus your lens manually. If you’re shooting a distant subject, focus on an object or light far away to achieve sharp focus across the scene.
For astrophotography, focusing on a distant light or using live view to zoom in on stars will give you the best focus.
Creative Night Photography Techniques
Night photography offers plenty of opportunities for creative experimentation. Here are some techniques to try:
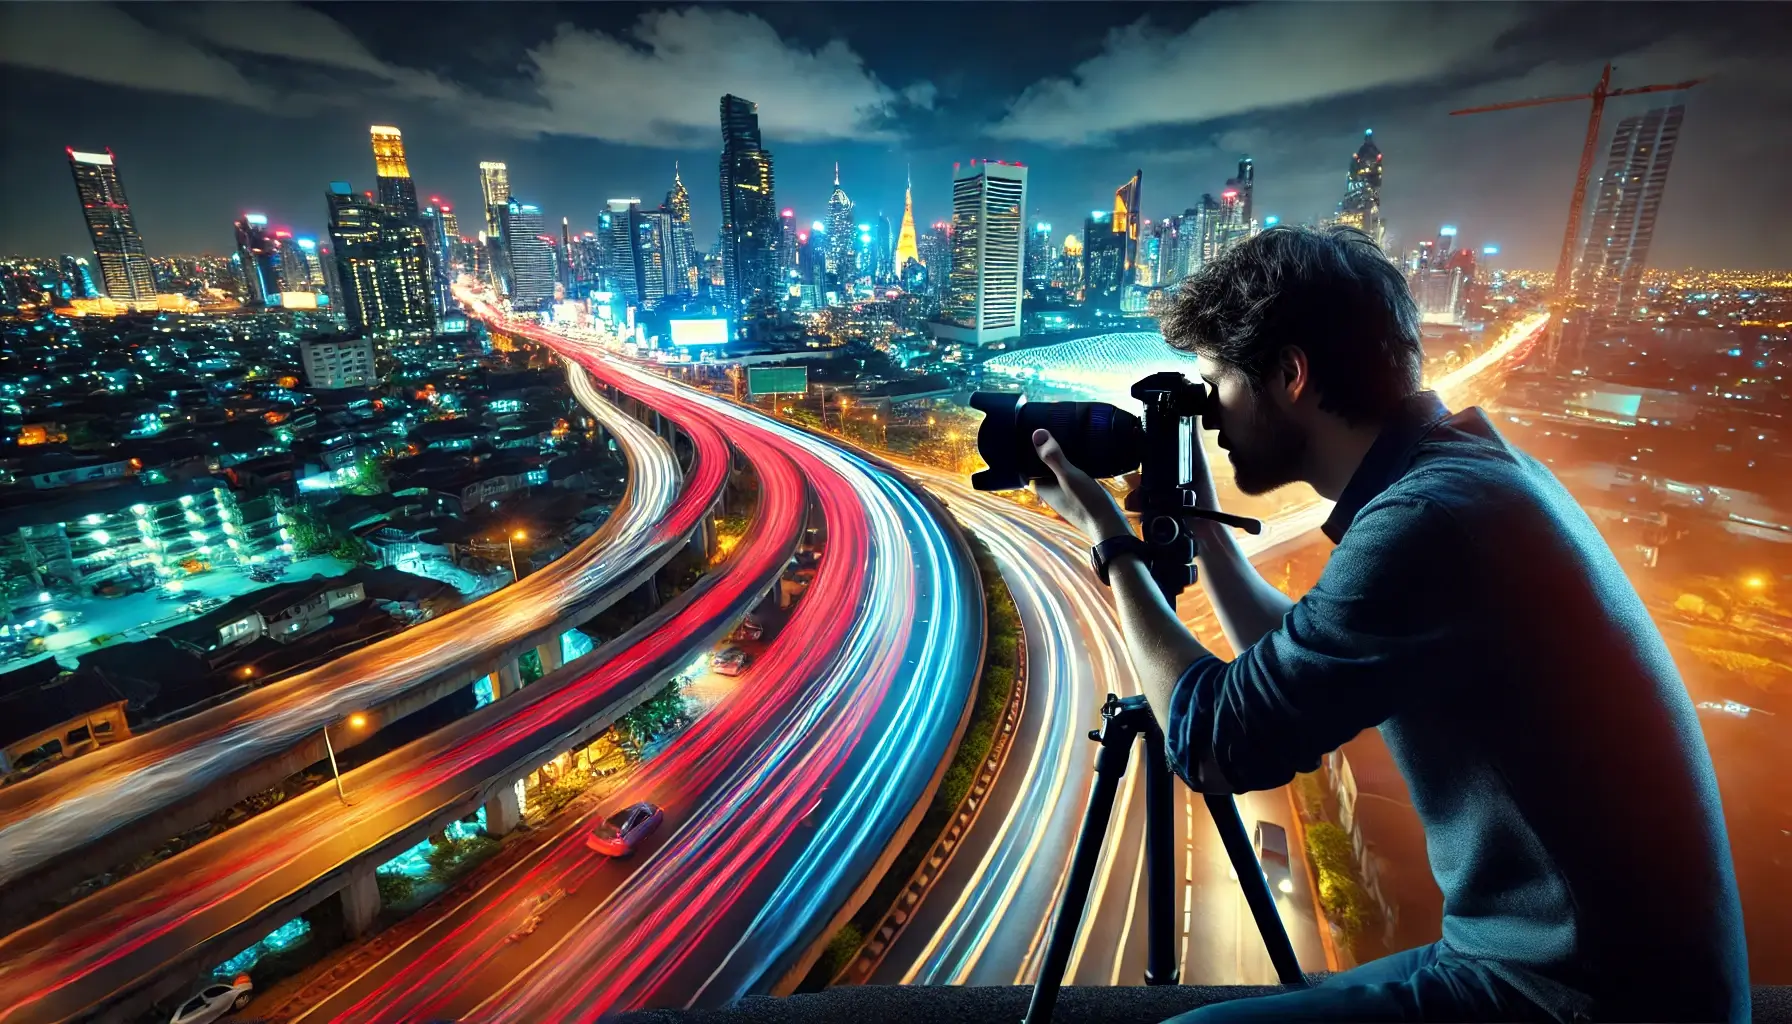
1. Light Trails
Light trails are a popular effect in night photography, created by moving light sources such as car headlights or streetlights. To capture light trails, use a long exposure (several seconds or more) and photograph light movement in a busy city or on highways. You can experiment with different shutter speeds to get the desired length of the light trail.
- Tip: Set your camera to shoot in bulb mode for longer exposures and experiment with different light sources, such as traffic or street lights.
2. Astrophotography and Star Trails
Capturing the stars at night can be one of the most rewarding forms of night photography. For astrophotography, use a wide aperture, a high ISO, and a relatively short shutter speed to capture the stars without creating trails. If you want to create star trails, use long exposures (typically several minutes) to capture the movement of stars across the sky.
3. Light Painting
Light painting is a creative technique where you use a handheld light source (like a flashlight or LED light) to “paint” parts of your image during a long exposure. The result is a combination of motion and light, which can add an artistic touch to your night photos.
Post-Processing Night Photography
After capturing your night shots, post-processing can help you bring out the best in your images.
1. Noise Reduction
Night photography often requires higher ISO settings, which can introduce noise. Use noise reduction tools in Lightroom or Photoshop to minimize grain and smooth out the image. Be sure to balance noise reduction with image sharpness.
2. Enhance Contrast and Colors
Increase the contrast and adjust the vibrancy of colors to bring out the details in your night shots. For cityscapes and starry skies, boosting the contrast can add depth and make the lights pop.
3. Correct White Balance
Night photography can sometimes produce unwanted color casts. Adjust the white balance to correct any tints and ensure that the colors in your images look natural.
Conclusion
Night photography opens up a world of creative possibilities, from capturing starry skies to light trails and cityscapes. With the right equipment, settings, and techniques, you can create stunning images that showcase the beauty of the night in ways the human eye can’t see. Experiment with different compositions, light sources, and long exposures, and let your creativity shine in the darkness.