Enquadramento e ângulo na fotografia podem parecer coisas de pouca importância, mas não são.
A cena pode fazer sentido, a luz tá ajudando e o assunto pode tá legal. Ainda assim, a foto pode acabar não encaixando.
Primeira coisa que tu vai pensar é que seja algum problema no equipamento.
Muitas vezes o problema era no lugar de onde a foto foi feita e no acabou sendo ou não sendo registrado.
Fotografar é escrever com a luz e, também, escolher a melhor posição.
Enquadrar é decidir o que entra
Enquadramento é resultado de escolhas antes de fotografar.
Você decide o que vai aparecer na foto e o que vai ficar de fora.
Parece simples, mas é aí que muita imagem acaba não sendo aproveitada.
Quer ver alguns exemplos? Um poste saindo da cabeça da pessoa, uma lixeira no canto, uma placa colorida chamando mais atenção que um rosto. Tudo isto cria um fundo cheio de coisa “brigando”.
A câmera registra tudo, inclusive aquilo o que se ignorou na hora do click. Repita o mantra, fotografar não é só apertar o botão.
Antes do click, olhe as bordas da imagem.
O assunto pode tá bom, mas um detalhe no canto vai praticamente inutilizar a foto.
Dá um passinho pro lado, pronto. Já ajudou.
A cena pode criar moldura
A moldura vai apontar pro assunto sem precisar explicar. Alguns elementos ajudam a conduzir o olhar, tipo: porta, janela, arco, galho, corredor, sombra e reflexo.
Tu pode te perguntar, ok, mas como identifico molduras “aproveitáveis”? Procure por cenas como uma pessoa vista pela janela, um prédio entre duas árvores, um rosto entre luz e sombra ou um objeto dentro de um círculo de claridade.
Só cuide pra moldura não ficar mais importante que o assunto, pode perder a foto.
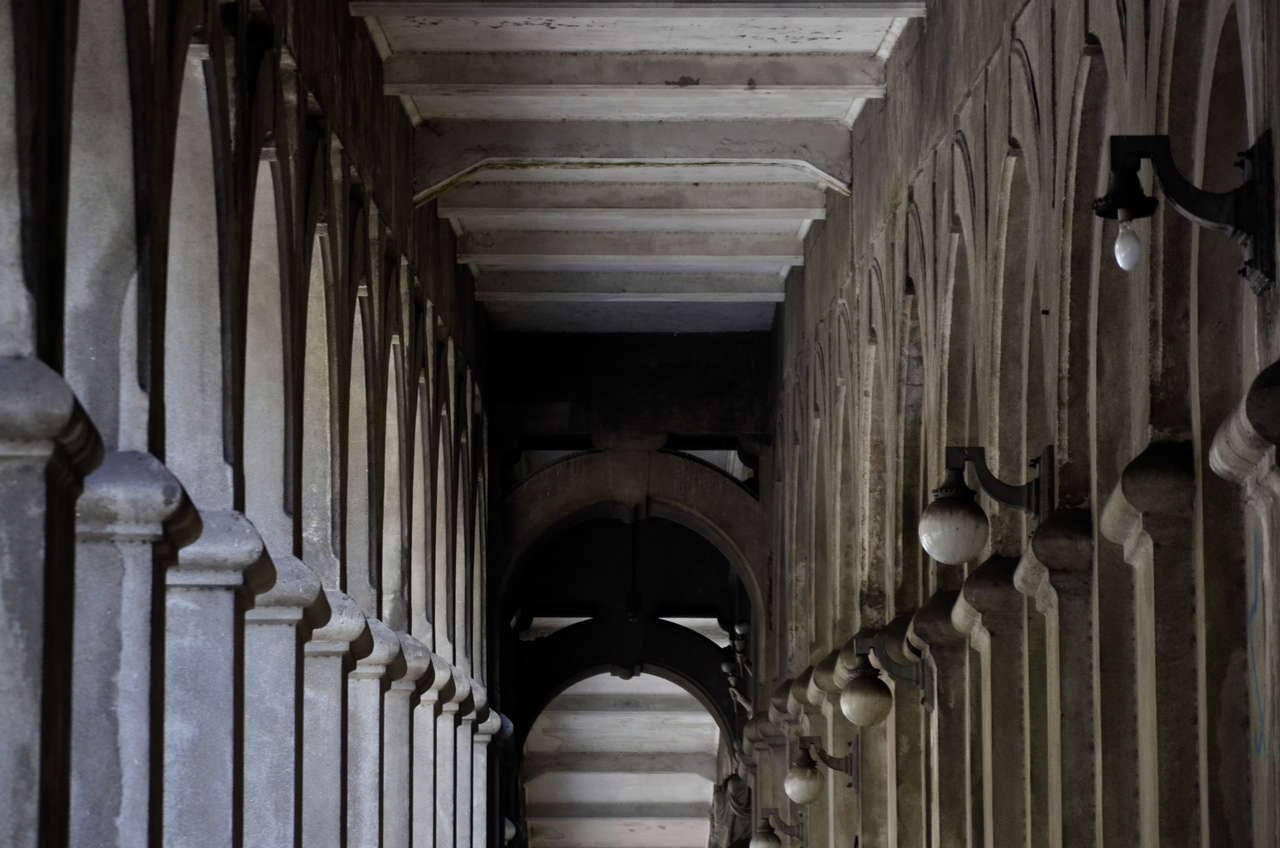
Simetria pede cuidado
Simetria pode deixar tua foto mais organizada. Tipo, quando as linhas se repetem, passa mais equilíbrio na imagem.
Simetria é um tipo de composição e alguns elementos vão funcionar como, por exemplo, corredor, escada, reflexo, prédio, ponte, porta e janela.
Se a ideia será centralizar, procure alinhar bem porque simetria torta vai permitir interpretação que tu errou antes do click.
Não é legal tentar “quebrar” a simetria se não tiver a intenção porque a foto fica feia, na verdade. Fica a dúvida, erro ou intenção?
No celular, tu pode acionar a grade, ela vai te mostrar quando a cena tá ficando assimétrica.
Ângulo muda a leitura
Ângulo é sobre ponto de vista. Tipo, ao fotografar na altura dos olhos, a imagem vai ficar mais natural, mais direta.
Funciona bem pra fotografar pessoa, rua, objeto ou situação em que tu quer uma leitura mais próxima do olhar comum.
Fotografar de cima diminui o assunto e vai mostrar mais contexto.
Ideal pra comida, mesa, chão, organização, formas e padrões.
Fotografar de baixo aumenta a presença do assunto, por exemplo, o prédio vai ficar mais imponente, a pessoa vai ganhar destaque e a árvore vai ganhar altura.
Ângulo não é só um efeito, é uma forma de ler a cena a ser fotografada. Exagerar no ângulo pode acabar dando um aspecto meio teatral.
Abaixar a câmera muda muita coisa
Algumas fotos “pedem” pra câmera sair da altura do peito.
Fotografia de criança, de animal, de objeto pequeno, de flor, de poça d’água, de comida ou algum outro detalhe de rua será interessante outro ponto de vista.
Abaixar a câmera vai mudar a relação do fotógrafo com o assunto.
No celular, isso é fácil de testar.
Aproximar, abaixar e se inclinar. Dá uma olhadinha de dar um passo pra trás melhora a foto.
Dependendo do que se quer fotografar, o registro fica melhor quando a gente muda nossa posição.
Foto de cima também tem seu lugar
Foto feita de cima funciona bem pra comida, mesa de trabalho, objetos, textura, desenho no chão, padrões e organização.
Com o tempo vai te dar impressão que acaba achatando os elementos da foto.
Se a intenção é mostrar volume, profundidade ou presença, o ângulo de cima pode deixar a cena menos interessante.
Antes de fotografar procure responder se o ângulo ajuda o assunto ou só parece diferente.
Enquadramento e ângulo na fotografia precisam ter sentido
Pode ser frustrante, mas não tem um só ângulo que vai te servir pra tudo.
O que existe é posição que faz sentido pra cada cena.
Enquadramento e ângulo tá dentro do contexto da fotografia: olhar, ajustar, testar e procurar perceber o que a cena tá pedindo.
Fotografar não é só apontar a câmera pro assunto, é decidir de onde olhar e o que deixar dentro da foto.